Tuesday, November 17, 2009

If you can't find it, make it!


I've searched high and low for a new ironing board cover for my short, little "sewing" ironing board. I keep it in my laundry room slid between my washer and the wall. It is very handy to pull out and use on the kitchen counter but lately it is starting to look pretty terrible. I get sticky iron-on interfacing on it, water stains, etc. Whatever you are picturing, it was probably worse... When Ikea let me down (what DOESN'T Ikea have?) Well, the answer is obviously those small ironing board covers (or ANY ironing board covers at all...). I saw one to sew at Sew, Mama, Sew! but honestly the instructions to make it "easier" seemed to make it harder to me. Rather than cutting off the OLD bias tape portion of the cover I bought a package of new (for 1.89) and just sewed on the new. Voila! I had a new ironing board cover AND enough fabric left over to make a clothes pin bag! I am spicing up my laundry room and making it more efficient! I found the cute teapot fabric from Sew Mama, Sew! and it arrived in 2 days from across the whole United States. I was impressed! Now if the retractable clothesline would only come...

Wednesday, November 11, 2009

Completely Coastal Giveway!


Want to win something really coastal and summery, right in the middle of our wet fall? Hurry over to Completely Coastal for a chance to win a tabletop piece here: http://www.completely-coastal.com/2009/11/tabletop-giveaway-choice-is-yours.html?showCom My choice is the aqua pitcher... :)

Tuesday, October 27, 2009

Home Made Autumn Soap with Streusel Topping


I have been gathering the ingredients for quite a quite now to make a batch of home made soap. I wanted to make a snowy white, thick bar like Rhonda, from the Down to Earth blog (see link below, left). I like the plain & simple things in life the best. My husband built me a great soap mold out of wood with a removable end. Monday, I got out the stuff and mixed up a batch. As I added the Palm Oil I noticed it was a goldeny-orange sort of color but I hoped that maybe that would cook out! NOPE! As I reached the trace stage I added some cinnamon oil for fragrance and quickly decided to pulse some oats, throw in some cinnamon & cloves and make a sort of streusel topping to swirl over the top and down through the bars. I quickly covered it with a towel to cure and said a prayer! Today I removed the cover and sliced the bars. I got 19 big bars of soap and they turned out quite nicely, albeit, NOT anyplace close to white! Still, for a first attempt I am satisfied and will certainly try again to get a simple smelling (I LIKE a soap smell) thick, WHITE bar.

Here is the recipe I used: (can't for the life of me find it again or remember where I got it! I have now located Rice oil to use in my next batch and will try Rhonda's recipe!)

5 1/4 oz Beeswax
8 3/4 oz Palm Oil
8 3/4 oz Coconut Oil
2# 12 oz Olive oil (use a lighter shade, or B grade...save the good stuff for cooking!) :)
9 1/2 oz Lye (you MUST have lye to make soap, but don't worry it is changed in a chemical reaction and will not be lye when you are done)
32 3/4 oz H20 (distilled or rain water)

First mix the lye into the water. (Do NOT do it the other way around! Never add water to lye!! ) Also make sure to wear eye gear, a mask and gloves (I do this outside). Prepare a place inside to work on (towels work great, or old newspapers) Allow lye (which will become VERY hot when mixed with the water) to cool to a lukewarm (by feeling the sides of your pitcher). Never use aluminum utensils, or pans, etc., when making soap!

Heat solid oils until liquid, then add other oils. Remove from heat. Let cool until lukewarm. (You can use a thermometer and it should be about 100-110 degrees. )
Start beating the oils with a stick mixer or electric mixer and pour the lye into the oils in a THIN stream (think divinity!) When all the lye is in put your pitcher in a safe place where no one will grab it or use it until you are done to wash it! Now beat until you get "trace" which is a thin line of soap, that when dripped from a spoon stays for a moment on top of the surface of the soap. When you reach this stage you can add color, fragrence, or the topping like I did. If you add another color or swirl to the top, reserve enough of your soap in the pan to cover the top of your mold. Pour the rest in a mold that you have pre-lined with freezer paper (shiny side up). Now color the remaining saop and pour it on top of the other soap in the mold and swirl it through the first layer with a knife, dowel or similar tool. Cover the top with Saran wrap or freezeer paper, again, then cover it with a towel so it will cool slowly. Let sit 12-24 hours (I peeked!!) and the soap will set up and should be ready to cut into bars. Let sit (on end) for about 4-6 weeks (the longer it cures the longer each bar will last and the more gentle it will be to your skin!) It really wasn't hard (although I made a mess doing it my first time grabbing things and not fully knowing which step was next) and I did get 19 good smelling big bars of soap that looks good enough to eat! I plan to make a nice Christmas gift with mine!

Wednesday, October 7, 2009

Baby


Baby is absolutely named correctly! When my daughter brought him home and named him "Baby"" I wondered if she had lost her mind. This was a "baby" Boxer who would probably (and did) grow to be about 90#! "Baby" didn't seem to quite fit! Today he is about 13-14 years old and there could not be a name for fitting for this gentle giant! He is the sweetest, big, guy. He whines to talk when he needs something but otherwise wants to be right with you to the point of laying on your foot, or leaning into you to get closer. What a sweetie! He has big, brown soulful eyes that follow you so you won't get away from him! Here is a photo after he ate some of the home made dog treats. Doesn't he look content? What a big BABY!!!

Monday, October 5, 2009

Home Made Doggie Treats


With Christmas coming right up here is a great recipe for cute little (or big) doggie treats:

1 1/4 cup shredded cheese
1/2 cup cornmeal
1/2 cup veg. oil
2 gloves minced garlic (no, a LITTLE garlic is actually NOT bad for dogs, but actually very healthy)... google it! :)
1/2 cup chicken or beef broth
1 cup whole wheat flour
1/2 cup all purpose flour
1/4 cup dry nonfat milk

Preheat oven to 300 degrees. Mix and knead until holds together. Roll out (I use a non stick mat) but you can also use a lightly floured surface. When rolled to about 1/4 inch, cut out with cute doggie shaped cookie cutters (think hydrants, bones, paw prints, etc). Bake at 300 degrees for 24-26 minutes. Remove from pan and cool on wire rack. These can be placed in cellophane bags, tied with ribbons, or into cute little boxes to be presented to your special little doggie (or BIG doggie). Baby is actually a B-I-G white boxer, weighing about 90#! (A guess..) Be prepared to be kissed, uumm, licked! Or in the case of my snooty toy poodle, snubbed! :(

Wednesday, September 30, 2009

Wonderful Fall Food


I recently came across a low carb pumpkin pancake recipe on one of my friend's blogs (Donna). I was wanting something different for breakfast since I eat LC and need a change once in a while. They were fantastic! I made a few changes (like adding baking powder) so here is my version:

Pumpkin Pancakes

Great with SF caramel sauce, a little syrup & whipped cream! :)

2 T tablespoons pureed pumpkin
¼ c. Egg Beaters, or 1 egg
1.5 tablespoon cream cheese
3 packets Splenda (I now use Turvia or Stevia... I just used 1/2 pkg Truvia
cinnamon (to taste)
nutmeg or pumpkin pie spice (to taste)
1 teaspoon vanilla extract
⅓ cup egg whites
1 scoop vanilla protein powder
¾ teaspoon baking powder

I have no photos, since I ate mine right away, but my daughter, Julie, came in as we were eating and she took a few so maybe we will get those posted soon. I had a large box of Jimmy Dean Turkey sausage from Costco (great BTW) and we had those with the pancakes and it made a great fall breakfast! With the protein powder it will keep you full for a LONG time! :) Enjoy! I had to have them for breakfast after writing this so here is the photos!

Friday, September 18, 2009

Chance to win 50.00 to TJ Maxx!

Here is a chance to win a $50.00 GC to TJ Maxx or Marshalls:
http://www.busybeelifestyle.com/fall-fashion-give-away/

Hope you win! (OR I win!!)

Monday, August 31, 2009

HEADS UP!!!!! ATTENTION: GIVEWAYS!!! Head on over...

All sorts of giveaways at this blog: http://myconfessionsasafirsttimemom.blogspot.com/
to celebrate the birthday of the blog owner's son, Josiah.

All sorts of things for Mommies, babies, (including jewelery & bath products)!

My own "Soft, Green Elephant" is featured and will be one of the giveaways for one of the lucky little babies with a blogging mommy!:)

http://www.etsy.com/view_listing.php?listing_id=29410189


Good Luck!!

Friday, August 28, 2009

Praises of Low Carb

Low Carb Pumpkin Cheesecake

For some years (since 2003) I have eaten low carb, non-processed, sugar-free, food. I stayed away from the "white" stuff and lost weight. Well... about 3 months ago I decided I could save money buy eating cheaper foods. BIG mistake! Some people just can't eat carby things and feel good or keep the weight off! I am back to eating low carb and losing more than a little weight I gained. I enjoy the recipes I have collected over the years. I LOVE eating this way and wonder why I was persuaded to go off after so many years. My cholesterol and other blood tests always improve when I eat LC. I have more energy, get more done and love the food..?!? I like the decreased appetite and having control over my food instead of the other way around. I joined an ABC (Autumn Boot Camp) this month which involves eating right and exercising regularly. Why did I quit THAT (exercising) also? Well, I know the answer to that. I had torn medial meniscus in both knees (running for years!) and needed two surgeries to repair them. I am back-on-track and feeling great! Now, if Julie will just NOT bring me any more of those delicious things she bakes! :)

Monday, August 24, 2009

Olivia's Christmas Baby Doll


She's all done and I don't know what Olivia will think, but I love this doll! She is so sweet, but simple and vintage-looking. Since I started with a newspaper (to make my pattern with) I am pleased with the result. There are a few things I would do differently but then again, too few to mention. (Couldn't resist!) She has a heart, a tush tag (Posh Pilfer) and is soft and cuddly. I will post a larger photo above. Any ideas what to name her? Who does she look like to you?

Larger View of Doll


Yes, her feet are supposed to be that way. :) That and her sweet face are what attracted me to her initially.

Sunday, August 23, 2009

Shhh....


It is a secret but I am sharing it here! I have spent the day sewing my little granddaughter (Miss Olivia) a funny-looking primitive rag doll. I found one I loved from a fellow Etsyian but it was only 13 inches tall. I wanted a little larger one so Livy could play with her better. I got a newspaper and started making a pattern and I am really pleased with it so far. (She is naked at this point, but does have a heart!) It really wasn't hard, but WAS time consuming! (All day!) I don't know how the lady sells them for what she does! They are a bargain at her 28.00! Tomorrow I am going to work on making her a nice little dress and she will be finished and can be wrapped and put away. I feel overwhelmed right now with all the sewing! The more I sew, the more there is to sew!! Alex starts his Senior year Wednesday so I am taking a slight pause to get him started back in school. Today seemed like a break since I sewed something for my personal use rather than for Posh Pilfer! Check back tomorrow and maybe she will be dressed! :)

Friday, August 21, 2009

Ready for Fall


Yes, I am ready for the fireplace, chili, crisp fall air and an end to this heat! Here, where I live, in Charlotte, NC it is so hot this time of year. It is smothering! I always think I will really make the most of summer but recently I find myself staying in air conditioning and sort of waiting for cooler weather. My friends in Canada, PA, etc. wish the opposite! It is cooler there, already and the trees are already losing their leaves. Seems we are never quite content with the weather! I love fall and look forward to it every year but this year I am starting early! This is a shot of one of my favorite places to visit in the fall. New River Bridge .. google and read about how they built it someday. It is fascinating! Anyone else ready for fall, early?

Thursday, August 20, 2009

Oh, no... a new trend!


All of a sudden I want to keep all the things I am making! Here is a few of the latest things I made. I ended up keeping the pincushion, but posting that chocolate silk wine bag! Both turned out to be real beautiful. I also want my coffee cup sleeve... Well, I guess if they were no good I wouldn't want them, right?

Tuesday, August 18, 2009


Busy, busy day! My chalkboards all sold, though, soit was a good one. My little green guy sold, too, so tomorrow I will be making a trip to the post office to send them off to Texas & Canada. Today I made something for myself and I really like it. (see above). You can use them for all sorts of things but I put my sewing stuff in it. I still need a dowel to fit into the casing on top of the divider, but basically it is done.

Tomorrow I plan to clean, clean and get caught up on some things before the next project. Sometimes you just have to get caught up! School starts next Wed. Alex's senior pictures are being taken on Thursday, PSA results for Rick Thursday, AND it is mowing day (4 or 5 yards). Does it EVER slow down?!?!

Monday, August 17, 2009

Happy Birthday, Rick!


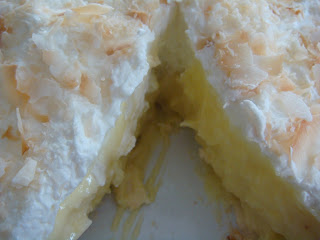
Today is my husband's birthday and as I was filling out the customs slip at the post office (my DD & SIL are in South Korea teaching English as a second language and I was sending them a box) I put the date at 8/17/51!! The lady and I had to laugh! She really didn't care about his birthdate... ummm. Anyway, we celebrated with a fried chicken dinner (his choice and his favorite meal). We had fried chicken, mashed potatoes, gravy, biscuits, his favorite chocolate pie & coconut cream pie (my favorite)! Needless to say we are stuffed! I forgot how very messy frying chicken is (we never have it anymore)! Now DH is watching football and going for more pie. He couldn't be happier at the moment... HaPpY BiRtHdAy!!

Recycled Frame with Chalkboard


My second chance chalkboard had been featured on a fellow Etsyan's blog:

http://onthedotcreations.typepad.com/onthedotcreations/2009/08/fun-with-chalkboard-paint-1.html

I learned that I can group my chalkboards like the other Etsyian did in her shop so I am off to add my silvery blue one to the photo, now! I appreciate her exposure since I am very new to this Etsy thing...

Above is my new grouping and I like it much better! I am new to arranging and taking a photo. Some people do it SOOO well on Etsy! AND they have such cute baby models... sigh...

Sunday, August 16, 2009

Check it out!


This item was featured on Indie Spotting this month: (Ladybug Jacket)

http://www.myshoppingconnection.com/indiespotting/babies-kids/

Now granted, I submitted it :) but still it is fun to see something you made featured! It's on sale this week at my Etsy site.

Today's addition is a neon green elephant and here she is:

http://www.etsy.com/shop.php?user_id=7682632


She is for sale and will soon be in a new home! :)

Soap Making (in the planning stage)

I do not have pictures for this one because it is still in the planning phases. I have been reading a blog here: http://down---to---earth.blogspot.com/ and I am planning to make her home made soap. I like the idea of knowing what is in the soap, making it like I want, and saving money. (This first batch will definitely NOT save money since I will have to buy the scale). I am in the process of evaluating and cutting any cost not necessary! We waste so much and really need so little. Rhonda (at down to earth) also has recipes for laundry detergent and a simple, refreshing approach to life. I promise to post photos of my soap (success or failure)! Now if I only had a garden...

Thursdays... :(


This is how we spend our Thursdays (after the day jobs): This is my husband and son. DS mows, DS trims and I edge/mow. It is very hot right now but with all of us it goes very quickly. It also pays my DS's way through Christian school and his Senior trip to the Dominican Republic in January!

Our good friends screen printed these shirts for us! Many thanks to Rick & Carol!

Friday, August 14, 2009

Robot With a Heart (or Tin Man!)


Something for little boys! They get left out a lot...

Wednesday, August 12, 2009

Purse and Wallet Set


Newest Etsy addition: purse & matching wallet. I enjoyed making this because it went together like a dream. Purse has 3 pockets inside and two outside! I would love to keep it.... :)

Tuesday, August 11, 2009

Scissors...


Yes, I am blogging about scissors! (Although I am also watching a movie with DH). My scissors have been getting so bad that my finger was raw! I finally broke down and got a new pair (made by Westcott). They are wonderful and GLIDE through the fabric! In fact they may take some getting use to, they glide so well!

Giraffe Onesie


Today's Etsy listing & sewing project:

Monday, August 10, 2009

Minky..?


Minky is a new fabric to me, but evidently NOT the world! Today I made a baby blanket to sell on Etsy and backed it with a soft, white minky. I quilted it and quilted a heart in the center. I also made a Onesie by making an applique of a matching pink elephant and stitched it onto the onesie. I added a minky ear (I had a scrap left and didn't want to waste it!) and a tiny heart button for the eye. I use coupons for all the major craft stores and purchase things only when they are on sale, or using a coupons in order to make a profit on my items. My main obstacle on Etsy is the sheer number of talented crafts people! Stiff competition! :( But, hey, if you want a quality hand sewn or crafted item, it is the place to be!

Sunday, August 9, 2009

How we did the Board and Batten...


My daughter, Julie, informed me I should explain how we did the board & batten. I guess I didn't explain because 1. I promised to keep posts simple & short, and 2. Karla at thelittlethingsthatmakeahouseahome.blogspot.com explained how she and her husband did theirs in their living room. Well.... I guess not everyone reads that blog!? Plus, we did ours years ago in the hall, and did our bedroom a year ago the same way. This was before Karla and her husband did their nice work so we did it a totally different way. We did not have the benefit of their knowledge! I have not read her post carefully enough to know exactly HOW they did theirs, but I do know they beveled the edges of the vertical pieces and we did not do that. (Ours were thin enough to meet the baseboard nicely). So other things may be different, also. You may want a choice of how to do the project, or one method may not work in your situation. So here goes...

What we did was decide where we wanted the top of the board & batten to hit on the wall. (I like a higher, more cottage-y look. ) I painted the wall up to that point white (just the regular wall). We used a thin, lattice cut pine board for the vertical pieces. They are just the right size and are thin enough to butt right into the baseboard. Decide on paper how you will space the boards evenly around the room. You may be able to miss switch plates and electrical outlets, but in a few places we had to partially cut out for them and they look great, still, when it is all painted out white. Pick a molding at the local home improvement store to "cap" the top. Think outside the box... We used a deep, shelf-like molding and capped that with a regular baseboard turned upside down. (Think layering!) The baseboard piece even had a notched groove in it which is perfect to secure plates, etc. Then the whole project gets caulked WELL!! (I caulked all along each lattice strip and each "seam" in the project so no light shows through and it looks like a solid piece of work. Then paint it out! White is my love.... Makes everything seem clean and so pristine! I used a semi-gloss from Valspar. It was not hard and not expensive but gives a breath-taking look. You can do it! The biggest expense is the molding and that coud be done with a simple board at the top.

Or latest project was a "pass-through" from our kitchen & living room. We wanted a more open look, but didn't want to redo any floors since we just finished redoing them not many years ago. Of course we did it with board & batten, too. It was quit a project with more than a few problems (4 major pipes running through that wall...) but I think it turned out quite nicely. It really opened up our living room space and now the TV is viewable from the kitchen which is so enjoyable while I cook or bake. I can also sew in the kitchen while the family watches a movie and watch it with them! :)

Saturday, August 8, 2009

Newest Etsy Addition


Short & Sweet like I promised. This is what I have been working on today: a cute little size 5/6 gray, fleece jacket with a ladybug applique that I hand-pieced on the left yoke with ladybug buttons! I just listed it on Etsy and found I had made another sale! It always amazes me when I see that something has sold! :-) Off to bed....

Friday, August 7, 2009

Bedroom Remodel with Board and Batten


Finally getting around to posting the bedroom remodeling project. We switched out hardware on our 25 year old bedroom set, put up some what I called Wainscoting but have learned from another blogger that it is officially a "Board & Batten" look... Who knew? I just know what I like! Clean and simple is my style. I made a new Duvet (clearance fabric for 2.00 a yard), European pillow shams, and framed some prints from our last vacation in Maine to lean on the ledge. We did install a new ceiling fan from Restoration Hardware, which was the biggest investment money-wise. Time-wise, definitely scraping, sanding, and painting the ceiling a nice smooth white was the winner! (It also made the biggest improvement!) We also added two new nightstand lamps by Verlix in aged bronze to match the ceiling fan. Simple.. All very simple & clean. If only ALL the rooms in the house were finished!

New Endeavors....


I started this blog literally years ago, but now plan to keep it up by posting frequent but short posts! Everyone is so busy these days. I started an Etsy shop (named Posh Pilfer, after our pet mini-lop bunny) in July selling handcrafted items (mostly sewing projects) and have enjoyed it immensely! One item I posted (my favorite, actually) is a pair of tiny Asian-inspired baby shoes! I sewed two tiny black beads to look like tiny buttons on each side. They are lined with soft black cotton. So fun to design and make! Now if only a baby's mom would think so, too.... :)